基于STM32体验BabyOS
再以STM32F107进行说明。相关的例子在 https://gitee.com/notrynohigh/BabyOS_Example
准备基础工程
基础功能需要做到以下几点:
①MCU时钟及片内外的初始化:
初始化时钟、GPIO、滴答定时器和串口1。
②实现用于心跳的定时器:
将滴答定时器作为心跳时钟。
static void _ClockInit()
{
    NVIC_PriorityGroupConfig(NVIC_PriorityGroup_4);
    RCC_APB2PeriphClockCmd(RCC_APB2Periph_GPIOA | RCC_APB2Periph_USART1 | RCC_APB2Periph_AFIO, ENABLE);
}

static void _GpioInit()
{
    GPIO_InitTypeDef GPIO_InitStructure;
    GPIO_InitStructure.GPIO_Mode  = GPIO_Mode_AF_PP;
    GPIO_InitStructure.GPIO_Pin   = GPIO_Pin_9;
    GPIO_InitStructure.GPIO_Speed = GPIO_Speed_50MHz;
    GPIO_Init(GPIOA, &GPIO_InitStructure);
    GPIO_InitStructure.GPIO_Mode = GPIO_Mode_IN_FLOATING;
    GPIO_InitStructure.GPIO_Pin  = GPIO_Pin_10;
    GPIO_Init(GPIOA, &GPIO_InitStructure);
}

static void _UartInit()
{
    NVIC_InitTypeDef  NVIC_InitStruct;
    USART_InitTypeDef USART_InitStructure;
    USART_InitStructure.USART_BaudRate            = 115200;
    USART_InitStructure.USART_WordLength          = USART_WordLength_8b;
    USART_InitStructure.USART_StopBits            = USART_StopBits_1;
    USART_InitStructure.USART_Parity              = USART_Parity_No;
    USART_InitStructure.USART_HardwareFlowControl = USART_HardwareFlowControl_None;
    USART_InitStructure.USART_Mode                = USART_Mode_Rx | USART_Mode_Tx;
    USART_Init(USART1, &USART_InitStructure);
    USART_ITConfig(USART1, USART_IT_RXNE, ENABLE);
    NVIC_InitStruct.NVIC_IRQChannel                   = USART1_IRQn;
    NVIC_InitStruct.NVIC_IRQChannelCmd                = ENABLE;
    NVIC_InitStruct.NVIC_IRQChannelPreemptionPriority = 1;
    NVIC_InitStruct.NVIC_IRQChannelSubPriority        = 0;
    NVIC_Init(&NVIC_InitStruct);
    USART_Cmd(USART1, ENABLE);
}

void BoardInit()
{
    _ClockInit();
    _GpioInit();
    _UartInit();
}
//滴答定时器
SysTick_Config(SystemCoreClock / TICK_FRQ_HZ);
NVIC_SetPriority(SysTick_IRQn, 0x0);
添加BabyOS代码
| 路径 | 部分/全部 | 用于快速体验 |
|---|---|---|
| bos/algorithm | 全部添加 | 全部添加 |
| bos/core | 全部添加 | 全部添加 |
| bos/drivers | 根据需要添加 | 暂时不添加其中文件 |
| bos/hal | 全部添加 | 全部添加 |
| bos/mcu | 根据需要添加 | 添加bos/mcu/st/stm32f10x/路径代码 |
| bos/modules | 全部添加 | 全部添加 |
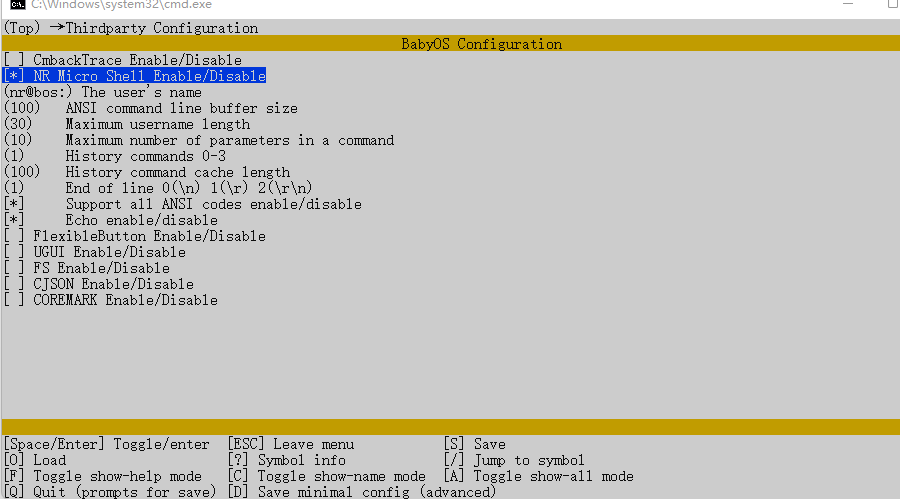
| bos/thirdparty | 根据需要添加 | 添加bos/thirdparty/nr_micro_shell/路径代码 |
| bos/utils | 全部添加 | 全部添加 |
| bos/_config | b_config.h 全局 配置文件 b_device_list.h 注册设备的文件 b_hal_if.h 驱动接口文件 |
编译器添加两个路径即可:
bos/
_config/ 如果配置文件拷贝到其他路径了,则添加相应路径即可。
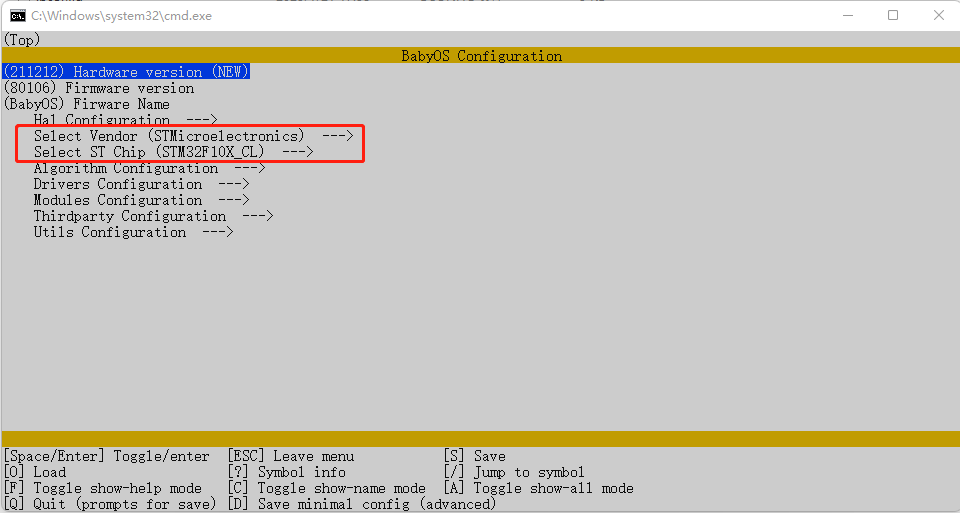
修改配置
确认已安装python,双击 _config/b_config.bat
调用必要的函数
包含头文件 b_os.h
①滴答定时器中断服务函数调用 bHalIncSysTick();
void SysTick_Handler()
{
    bHalIncSysTick();
}
②调用 bInit(); bExec();
int main()
{
    BoardInit();
    SysTick_Config(SystemCoreClock / TICK_FRQ_HZ);
    NVIC_SetPriority(SysTick_IRQn, 0x0);

    bInit();          //bos初始化
    bShellInit();     //shell初始化
    while (1)
    {
        bExec();      //bos执行函数
    }
}
③由于勾选了shell功能模块,所以需要在串口接收中断服务函数里调用bShellParse,将数据喂给模块。
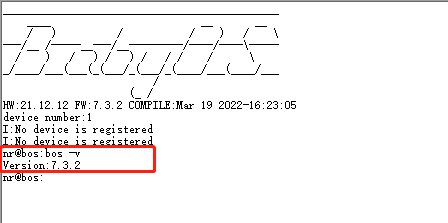
快速体验结果
BabyOS的shell模块默认支持查询版本的指令,输入 bos -v 便可以查询到版本。